
Introduction to Cherry Danish
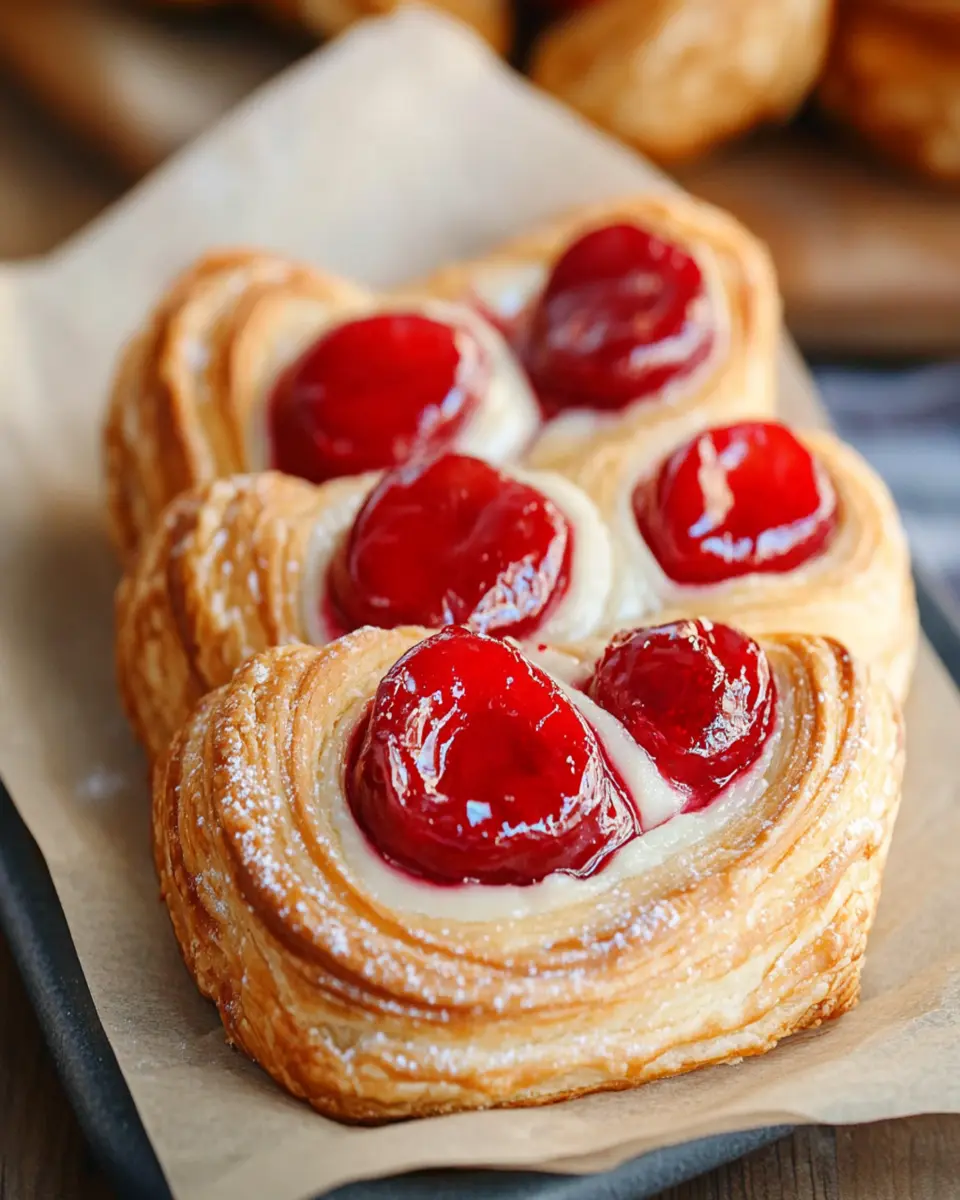
Cherry Danish pastries are a delightful treat that brings the flavor of sweet cherries wrapped in a flaky, buttery crust right to your kitchen. Whether you’re enjoying a leisurely weekend brunch or need a quick dessert for a gathering, this Cherry Danish recipe is sure to impress your friends and family.

The Joy of Baking
For young professionals and homemade-food lovers, finding time to bake can sometimes feel like a challenge. However, this simple recipe allows you to create a delicious dessert in just 35 minutes, making it perfect for those who are pressed for time yet still want to enjoy the warmth of freshly baked goods. Imagine pulling a tray of golden-brown pastries from the oven, the sweet aroma of cherries wafting through your home, and the joy that comes from sharing these treats with loved ones.
Why Choose Cherry?
Cherries offer not only a burst of flavor but also a hint of nostalgia. They remind many of summer vacations spent picking fruit or enjoying a slice of cherry pie. By using cherry pie filling, this recipe allows you to capture that essence effortlessly, ensuring a consistent and delicious filling every time. Plus, the vibrant color of cherries adds visual appeal to your pastries, making them as delightful to look at as they are to eat.
In conclusion, the Cherry Danish recipe is not just about satisfying your sweet tooth; it’s about creating moments of joy with each bite. So roll up your sleeves, and let’s get baking!
Key Ingredients
Dough
1 package puff pastry: This flaky pastry forms the base of your Cherry Danish, providing a light and airy texture that complements the sweet filling beautifully. Make sure to thaw it properly before use to achieve the best results.
Filling
1 can cherry pie filling: The star of the show, this cherry pie filling offers a burst of sweetness and vibrant color, making your pastries irresistible. It saves time and ensures consistency, allowing you to focus on the fun part—baking!
Egg Wash
1 egg (for egg wash): Brushing the tops of your Danishes with an egg wash gives them that beautiful golden-brown color and adds a touch of shine, elevating their appearance.
Icing
1/2 cup powdered sugar: This is the main ingredient for the icing, lending sweetness and a delightful finish to each Danish. It pairs perfectly with the tartness of the cherries.
1-2 tablespoons milk (for icing): Mixing milk with powdered sugar creates a smooth icing that you can drizzle over the cooled pastries, adding a final touch of sweetness and flair.
Using these key ingredients, you can create a delicious Cherry Danish recipe that is not only easy to make but also brimming with flavor. Baking at home allows you to enjoy fresh pastries right from your oven, making any occasion special.
Why You’ll Love This Recipe
Cherry Danish pastries are not just a treat for your taste buds; they are an experience that brings joy to any occasion. This Cherry Danish recipe is perfect for young professionals and homemade-food lovers who want a delicious dessert without spending hours in the kitchen.
Quick and Easy to Make
In just 35 minutes, you can whip up a batch of these delightful pastries. With minimal prep time and straightforward instructions, even the busiest of schedules can accommodate this recipe. Imagine coming home after a long day and treating yourself to warm, flaky pastries filled with cherry goodness—what’s not to love?
The Perfect Balance of Flavors
The combination of the buttery, flaky puff pastry and the sweet cherry filling creates a harmony of flavors that will have everyone reaching for seconds. The icing adds a touch of sweetness that perfectly complements the tartness of the cherries. Each bite is a delightful blend of textures and tastes that will leave a lasting impression.
Versatile and Customizable
One of the best things about this Cherry Danish recipe is its versatility. While cherries are a classic choice, you can easily substitute other fruit fillings to suit your preferences. This means you can enjoy a different flavor experience each time you bake, making it an ideal recipe for any fruit lover.
In summary, this Cherry Danish recipe is a fantastic choice for those looking to create a delicious dessert quickly and easily. With its delightful flavors and simple preparation, it’s no wonder why you’ll love baking these pastries at home!
Variations on Cherry Danish
Cherry Danishes are versatile pastries that can be easily adapted to suit your taste preferences or the seasonal ingredients you have on hand. This section explores some delightful variations to take your Cherry Danish recipe to the next level.
Fruit Filling Alternatives
While cherry filling is a classic choice, consider experimenting with other fruit fillings to add a personal twist to your pastries. For example, you can use blueberry, raspberry, or even a mixed berry filling for a vibrant burst of flavor. Each fruit brings its unique sweetness and tartness, providing a new taste experience with every batch you bake.
Adding a Cream Cheese Layer
For an extra creamy delight, try incorporating a layer of cream cheese filling beneath the fruit filling. Simply mix softened cream cheese with a bit of sugar and vanilla extract, then spread it onto the puff pastry before adding the cherry filling. This addition not only enhances the flavor but also adds a rich, velvety texture that complements the flaky pastry beautifully.
Glaze Variations
Instead of the traditional icing made from powdered sugar and milk, you can get creative with glazes. A lemon or almond-flavored glaze will add a zesty or nutty touch, respectively. To make a lemon glaze, simply mix powdered sugar with fresh lemon juice until smooth. This bright flavor will contrast nicely with the sweetness of the cherries, making your Danish pastries even more irresistible.
By exploring these variations, you can enjoy a new take on the beloved Cherry Danish recipe, keeping your baking adventures exciting and delicious.

Cooking Tips and Notes
Perfecting the Puff Pastry
To achieve the best results with your Cherry Danish recipe, start with properly thawed puff pastry. If it’s too cold, it will be difficult to roll out, and if it’s too warm, it will become sticky and hard to work with. A light dusting of flour on your work surface will help keep the pastry from sticking.
Sealing the Edges
When folding the corners of the pastry over the cherry filling, ensure that the edges are well-sealed. This prevents the filling from leaking out during baking, which can make a mess and alter the texture of your pastries. Use a fork to press down on the edges for an attractive finish and a secure seal.
Baking Tips
Keep an eye on your pastries while they bake! Ovens can vary, and while the recipe suggests 15-20 minutes, you’ll want to remove your Danishes when they’re a beautiful golden brown. This ensures they are cooked through while maintaining that flaky goodness.
Cooling and Icing
Allow the Cherry Danishes to cool for just a few minutes before drizzling with icing. This will help the icing set slightly, providing a nice finish that won’t just run off. The combination of sweet icing and warm pastry creates an irresistible treat.
In summary, these cooking tips will ensure your Cherry Danish turns out perfectly every time, making your baking experience enjoyable and rewarding.
Serving Suggestions
Cherry Danishes are not only delightful on their own but can also be paired with various accompaniments to elevate your dessert experience. Here are some serving suggestions that will impress your guests and satisfy your sweet tooth.
Pair with Coffee or Tea
Enjoy your Cherry Danish with a hot cup of coffee or tea. The rich flavors of brewed coffee or the soothing notes of herbal tea complement the sweet cherry filling, making for a perfect afternoon treat or breakfast option.
Add Fresh Fruit
Consider serving your pastries alongside fresh fruit, like sliced strawberries or a mix of berries. The freshness of the fruit provides a delightful contrast to the warm, flaky pastry and adds a pop of color to your plate. Plus, it adds a nutritious element to your dessert!
Serve with Ice Cream
For a decadent dessert, pair your Cherry Danish with a scoop of vanilla or almond ice cream. The creaminess of the ice cream balances the sweetness of the cherries, creating a rich and satisfying dessert experience.
In summary, whether you enjoy your Cherry Danish with a warm beverage, fresh fruit, or a scoop of ice cream, these serving suggestions will enhance your enjoyment of this delightful pastry. They make for a wonderful treat that everyone can appreciate!

Time Breakdown
Preparation
Prepare all your ingredients and tools to streamline the baking process. Thaw the puff pastry and preheat your oven to ensure everything is ready to go.
Cooking/Baking
The baking time for your Cherry Danish is a quick 15-20 minutes, allowing you to enjoy warm pastries in no time. Keep an eye on them to achieve that perfect golden brown color.
Total
Overall, you can make this delightful treat in just 35 minutes from start to finish, making it an ideal option for a quick dessert or snack. With this simple time breakdown, you can efficiently plan your baking session!
Nutritional Facts
When enjoying a Cherry Danish, it’s good to be aware of its nutritional profile. Each serving contains approximately 250 calories, making it a delightful treat that fits well into a balanced diet. With 15g of total fat, including 5g saturated fat, it’s a rich pastry that should be savored.
In addition to the delightful taste, you’ll find 30g of carbohydrates, which includes about 10g of sugar and 1g of dietary fiber, and it offers 3g of protein per serving. This balance of flavors and nutrients makes the Cherry Danish recipe a satisfying dessert option for those looking for a sweet treat.
FAQ based on ‘People Also Ask’ section
What is a Cherry Danish?
A Cherry Danish is a sweet pastry made from flaky puff pastry filled with cherry pie filling. It’s often topped with a sugary icing, making it a delightful treat for breakfast or dessert.
How do you store Cherry Danishes?
To store Cherry Danishes, keep them in an airtight container at room temperature for up to two days. For longer storage, you can refrigerate them, but they are best enjoyed fresh for optimal texture and flavor.
Can I use fresh cherries instead of canned?
Yes, you can use fresh cherries in your Cherry Danish recipe! Simply pit and chop the cherries, then mix them with a bit of sugar to create a filling that mimics the sweetness of canned pie filling.
How do I make the icing for my Cherry Danish?
To make the icing, mix 1/2 cup of powdered sugar with 1-2 tablespoons of milk until smooth. Adjust the consistency to your liking, adding more milk for a thinner icing or more powdered sugar for a thicker glaze.
These FAQs provide quick answers to common questions about the Cherry Danish recipe, making it easier for you to enjoy this delightful pastry!
Conclusion to Cherry Danish Recipe
In conclusion, the Cherry Danish recipe is a delightful way to enjoy a sweet pastry that is both easy to make and delicious. With its flaky puff pastry and sweet cherry filling, this treat is perfect for any occasion, whether as a dessert or a special breakfast item. The beauty of this recipe lies in its simplicity and versatility—feel free to experiment with different fruit fillings to find your favorite!
Not only is this Cherry Danish a crowd-pleaser, but it also allows you to impress your friends and family with minimal effort. So why not give it a try? Bake a batch today and enjoy the warm, comforting taste of homemade pastries. Don’t forget to share your creations and let others know how easy it is to make this charming dessert!
Print
Cherry Danish Recipe
- Total Time: 35 minutes
- Yield: 4 servings 1x
- Diet: Vegetarian
Description
A delicious and flaky Cherry Danish pastry filled with sweet cherry filling.
Ingredients
- 1 package puff pastry
- 1 can cherry pie filling
- 1 egg (for egg wash)
- 1/2 cup powdered sugar
- 1-2 tablespoons milk (for icing)
Instructions
- Preheat the oven to 400°F (200°C).
- Roll out the puff pastry on a lightly floured surface.
- Cut the pastry into squares and place a spoonful of cherry filling in the center.
- Fold the corners of the pastry over the filling and seal the edges.
- Brush the tops with egg wash.
- Bake in the preheated oven for 15-20 minutes or until golden brown.
- Mix powdered sugar and milk to create an icing and drizzle over the Danishes once cooled.
Notes
- Ensure the puff pastry is thawed before rolling.
- You can substitute with other fruit fillings if desired.
- Prep Time: 15 minutes
- Cook Time: 20 minutes
- Category: Dessert
- Method: Baking
- Cuisine: American
Nutrition
- Serving Size: 1 Danish
- Calories: 250
- Sugar: 10g
- Sodium: 150mg
- Fat: 15g
- Saturated Fat: 5g
- Unsaturated Fat: 10g
- Trans Fat: 0g
- Carbohydrates: 30g
- Fiber: 1g
- Protein: 3g
- Cholesterol: 20mg